Assessing Your Deck and Choosing the Right Coating for Monmouth County Weather
Before you pick up a single brush or rent a power washer, walk your deck and take stock of what you’re working with. The wood species, age, current condition, and previous finishes all dictate your coating choice, and getting this decision wrong is the fastest way to waste a weekend and your budget. In the Freehold and Monmouth County area, decks face a punishing combination of summer humidity that can top 80 percent, winter freeze-thaw cycles that crack poorly sealed wood, and salt air drifting in from the coast that accelerates corrosion on fasteners and finish breakdown.
Start by identifying your deck’s wood type. Pressure-treated pine and cedar are most common in Central Jersey, and each responds differently to stain versus paint. If your deck is newer (less than five years old) and the grain is still visible and attractive, a semi-transparent or transparent stain will showcase the wood’s natural beauty while providing UV and moisture protection. Stains penetrate the wood rather than sitting on top, so they’re less prone to peeling, but they require reapplication every two to three years depending on sun exposure. For older decks with weathered or mismatched boards, a solid stain or exterior paint offers better coverage and hides imperfections, lasting four to six years with proper prep.
The oil-based versus water-based debate matters more than most DIYers realize. Oil-based stains penetrate deeper and handle moisture better, which is critical in our humid New Jersey summers when overnight dew sits on horizontal surfaces until mid-morning. However, they take longer to dry (sometimes 48 hours between coats in high humidity), smell stronger, and require mineral spirits for cleanup. Water-based products dry faster, clean up with soap and water, and have come a long way in durability, but they can raise the wood grain and may not penetrate as deeply on dense hardwoods. If you’re tackling this project in late spring or early fall when humidity is moderate, water-based is manageable. For mid-summer work, factor in extended drying times or consider calling in a professional who can control application timing and conditions.
One often-overlooked factor is your deck’s sun exposure. South and west-facing decks in Monmouth County get hammered by afternoon sun, which fades pigment and breaks down finish faster. For these high-exposure areas, choose a stain or paint with robust UV inhibitors. If your previous finish is peeling or flaking (common after three to five years), you’re looking at significant prep work, including stripping or heavy sanding. At that point, many homeowners find that hiring exterior painting professionals delivers better long-term value than spending multiple weekends on prep. Our team at Richard K. Moore Professional Painting has refinished hundreds of decks across Freehold Township and surrounding areas, and we can assess whether your deck is a candidate for a DIY refresh or needs professional surface restoration before any coating goes down.
Another consideration specific to our region is the presence of mildew and algae growth. The combination of shade, moisture, and warmth creates ideal conditions for green and black staining on deck surfaces, particularly on north-facing boards or areas under overhangs. Standard paints and stains will not adhere properly over mildew, and the growth will continue underneath, causing premature failure. You’ll need a deck cleaner with mildewcide or a bleach solution as part of your prep process. Look for products specifically formulated for the wood type you’re working with, as some cleaners can darken or damage certain species.
When selecting your finish color, remember that darker tones absorb more heat and can make deck surfaces uncomfortably hot for bare feet during July and August in Central Jersey. Lighter colors reflect heat but may show dirt and wear more readily. Mid-tone grays and taupes have become popular in the Monmouth County area because they balance heat reflection with practical wear characteristics. Whatever color you choose, buy enough product to complete the entire project in one go. Batch variations in tint can be noticeable, especially with solid stains and paints, and running out mid-project means potential color mismatches that are difficult to hide on large horizontal surfaces.
Essential Tools and Materials that Separate Amateur Results from Professional Finishes
Having the right tools doesn’t just make the job easier, it directly determines the quality and longevity of your finished deck. Cutting corners on equipment is where most DIY deck projects go sideways, resulting in uneven coverage, lap marks, and finishes that start failing within a year. Let’s break down what you actually need versus what the big-box stores try to upsell you on.
For cleaning, you’ll need a power washer, but PSI matters enormously. Most rental units run 2,500 to 3,000 PSI, which is overkill for softwoods like cedar and pine common in New Jersey decks. At that pressure, you’ll gouge the wood, raise the grain excessively, and create a fuzzy surface that drinks stain unevenly. Dial your pressure down to 1,200 to 1,500 PSI and use a 25 to 40-degree nozzle tip to fan the spray. Keep the wand moving in smooth, overlapping passes, holding it about 12 inches from the surface. If you’ve never run a power washer before, practice on an inconspicuous section first. Inconsistent technique leaves visible stripes that telegraph through the final finish. Many homeowners in the Freehold area choose to hire our power washing service for this step alone because we have commercial-grade equipment with adjustable pressure and years of experience matching pressure to wood species and condition.
Sanding is non-negotiable if you want a finish that lasts. You’ll need an orbital sander for flat deck boards (60-grit to knock down rough spots and old finish, then 80-grit for smoothing) and a detail sander or sanding sponges for railings and tight corners. Budget three to four hours of sanding time for every 200 square feet of deck surface. Don’t skimp here: a poorly sanded deck won’t accept stain evenly, leaving blotchy areas that scream amateur hour. Wear a quality dust mask rated N95 or better, because sanding pressure-treated lumber kicks up fine particles you don’t want in your lungs.
For application, brushes beat rollers for railings and spindles, giving you control and forcing finish into crevices. A 4-inch natural-bristle brush works beautifully with oil-based products; synthetic brushes are better for water-based stains. For deck boards, a pad applicator on a pole lets you work standing up and applies stain more evenly than rollers, which can leave texture. Sprayers are faster but require significant masking, create overspray issues (your neighbors will not appreciate a fine mist of stain drifting onto their siding), and use more product. Unless you’re doing a massive multi-level deck, stick with brush and pad.
Finally, invest in proper safety gear: knee pads for the hours you’ll spend working railings, chemical-resistant gloves, and safety glasses. Deck stains and cleaners are caustic, and a splash in the eye or prolonged skin contact isn’t worth the risk. If the tool list and time investment are adding up to more than you bargained for, remember that professional painting contractors like Richard K. Moore Professional Painting already own commercial-grade equipment and can complete in two days what might take you two weekends, with a warranty-backed finish that stands up to Monmouth County’s weather extremes.
Step-by-Step Cleaning and Repairing to Create a Solid Foundation
The afternoon sun in Monmouth County can be unforgiving on wooden decks, and a fresh coat of paint does more than refresh the look. It creates a protective barrier against moisture, UV rays, and the freeze-thaw cycles that are all too common in Central Jersey. When done correctly, painting your deck extends its lifespan by years and prevents costly wood rot repairs down the line.
Many homeowners underestimate the importance of choosing the right product for their specific deck conditions. A deck in full sun facing south requires different protection than one shaded by mature oaks. Oil-based stains penetrate deeper into the wood grain and hold up better in high-traffic areas, while water-based paints offer easier cleanup and faster drying times during humid summer months.
If your deck shows signs of previous finishes that are peeling or flaking, you’ll need to remove all loose material before applying anything new. Paint will not adhere properly to a compromised surface, no matter how many coats you apply. This is where proper surface preparation becomes non-negotiable, and where many DIY projects fail before they even begin.
Start by clearing everything off your deck, including furniture, planters, and grills. Sweep away loose debris, leaves, and dirt that have accumulated between boards. For the actual cleaning, a pressure washer set between 1200 and 1500 PSI works well for most wooden decks. Higher pressure can damage softer woods like cedar or older pressure-treated lumber, gouging the surface and creating an uneven texture that shows through your finish. Hold the wand at a consistent angle about 12 inches from the surface and work in the direction of the wood grain, overlapping each pass slightly to avoid streaking.
Apply a dedicated deck cleaner or a mixture of oxygen bleach and water to tackle stubborn stains, mildew, and algae. In the Freehold area, decks in shaded or wooded settings often develop dark patches where moisture lingers. These need extra attention because mildew will continue growing under a fresh coat of paint if not killed and removed completely. Let the cleaning solution sit for 10 to 15 minutes, then scrub with a stiff brush on problem areas before rinsing thoroughly with the pressure washer. Coastal humidity means surfaces take longer to dry here than in drier climates, so plan on waiting at least 48 hours after washing before moving to the next step, and longer if the forecast calls for rain or heavy dew.
While the deck is drying, walk it carefully and inspect every board. Look for soft spots, cracks wider than a quarter inch, popped nails, and loose or splintered boards. Replace any board that feels spongy underfoot, as it indicates rot that will only worsen once sealed under paint. For smaller cracks and gaps, use an exterior-grade wood filler that can be sanded smooth and will expand and contract with seasonal temperature changes. Countersink any protruding nails or screws so they sit below the surface, then fill the holes. Railings and stairs require the same scrutiny. Wobbly balusters or loose handrails are safety hazards and should be tightened or replaced before you apply any finish.
If your deck has significant structural issues, deep rot, or extensive board damage, this is when calling a professional makes sense. Our team at Richard K. Moore Professional Painting offers power washing and deck repair services throughout the Monmouth County area, and we can handle everything from surface cleaning to board replacement and refinishing. We’ve worked on decks across Freehold, Holmdel, and Colts Neck, and we know exactly how the local climate affects wood surfaces and what it takes to prepare them for a long-lasting finish.
Sanding and Surface Preparation for A Smooth, Finish-Ready Surface
Once your deck is clean, repaired, and bone-dry, sanding transforms the surface from acceptable to professional-grade. Power washing raises the wood grain and leaves fibers standing upright. If you skip sanding, your finish will feel rough and fuzzy, and those raised fibers will eventually break down, allowing moisture penetration and premature finish failure. This step is tedious and dusty, but it’s the difference between a deck that looks good for two years and one that looks great for five or more.
Start with 60-grit sandpaper on an orbital sander for deck boards. Work with the grain in long, smooth strokes, overlapping each pass. The goal is to knock down raised grain, smooth out any remaining rough patches, and feather the edges of old finish if you weren’t able to strip it completely. Don’t sand excessively in one spot or you’ll create dips and uneven areas. After the first pass, vacuum or sweep thoroughly to remove dust, then switch to 80-grit and make a second pass. This finer grit leaves the surface smooth to the touch and ready to accept stain evenly.
Railings, spindles, and stair treads require hand-sanding or a detail sander. These areas get the most hand contact, so they need to be splinter-free. Use sanding sponges (they conform to curves and edges better than paper) and work methodically around each spindle and rail cap. Pay extra attention to the top rail, where people rest their hands. If you’re dealing with an older deck that had a thick solid stain or paint, you may need to strip it chemically or with a more aggressive sanding approach. Heavy buildup won’t just sand off with an orbital; you’ll need a paint stripper or a professional-grade floor sander, which brings its own learning curve and risk of surface damage if you’re not experienced.
After sanding, vacuum the entire deck surface, including between board gaps, and wipe down railings with a tack cloth to remove every trace of dust. Any dust left behind will mix with your stain or paint and create a gritty texture. At this stage, run your hand over the wood. It should feel uniformly smooth, with no rough spots or sharp edges. If it doesn’t, sand those areas again. This is your last chance to get the surface perfect.
Here’s where many DIYers hit a wall: the sheer physical effort and time required for thorough sanding. A typical 12×20-foot deck takes six to eight hours of sanding if you’re doing it right, and that doesn’t include railings and stairs. If you’re working around a full-time job and family commitments, this phase can stretch across multiple weekends. For homeowners in the Freehold and Monmouth County area who want professional results without the sweat equity, our deck sanding and refinishing services include commercial-grade equipment and trained crews who can prep and sand a deck in a fraction of the time, with dust-collection systems that keep your yard cleaner. We’ve refined our process over 30 years serving Central Jersey, and we know exactly how much sanding different wood species and finish types require to achieve a flawless base for coating.
Applying your Finish and Ensuring Long-Lasting, Beautiful Results
You’ve assessed, cleaned, repaired, and sanded. Now comes the rewarding part: applying the finish that will protect your investment and give you that rich, vibrant color. But technique matters enormously here. Poor application creates lap marks, puddles, uneven color, and finish that wears prematurely in high-traffic areas. Let’s walk through the process step by step.
Check your weather forecast carefully. You need at least 24 to 48 hours of dry weather with temperatures between 50 and 85 degrees and humidity below 70 percent. In Monmouth County, late spring (May) and early fall (September through mid-October) offer the most reliable windows. Avoid mid-summer if possible; our July and August humidity routinely climbs above 75 percent, which extends drying times dramatically and can cause water-based stains to dry unevenly or oil-based products to remain tacky for days. Early morning dew is another consideration. Don’t start applying finish until the deck surface is completely dry, usually mid-morning on humid days.
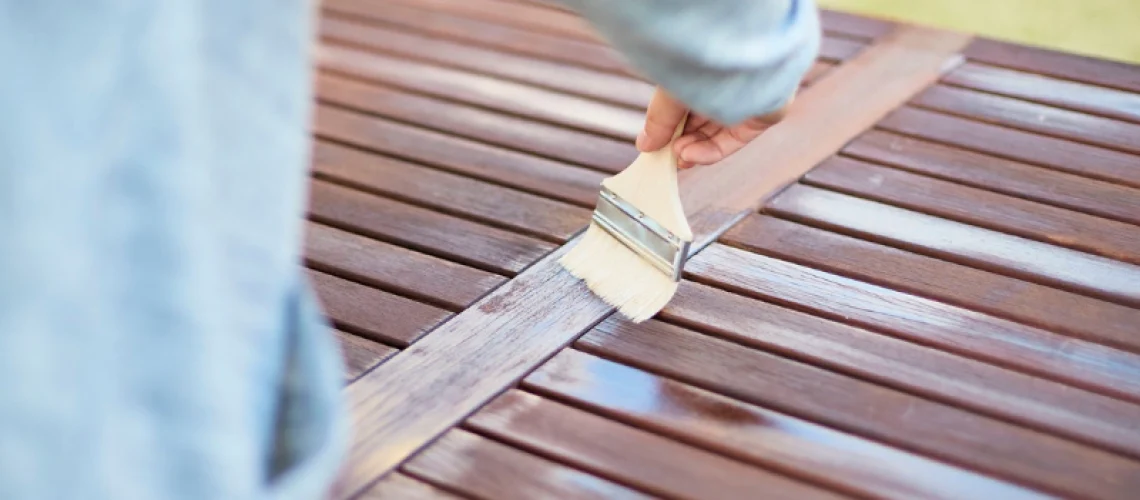
Start with railings and spindles, working from top to bottom so any drips land on unfinished deck boards. Use a 4-inch brush and apply stain or paint generously but not so heavily that it puddles. The key with stain is penetration, not buildup. Work it into the wood with your brush, then back-brush to eliminate drips and ensure even coverage. For spindles, wrap a rag around each one and wipe off excess stain after application to avoid runs. This technique gives you uniform color without the thick coating that peels in a year or two.
For deck boards, work across the width of the deck (so you’re applying with the grain) using a pad applicator or brush. Apply stain to two or three boards at a time, working the full length of each board before moving to the next. Don’t stop mid-board; wet edges that dry before you come back create visible lap marks. Keep a wet edge by working relatively quickly. If you’re using a semi-transparent stain, one coat may be sufficient on new or lightly weathered wood. Solid stains and paints typically require two coats for even color and full protection. Wait the recommended recoat time on the product label (usually 4 to 24 hours depending on product type and humidity) before applying a second coat.
Pay special attention to end grain (cut board ends, any areas where you’ve replaced boards). End grain is porous and will soak up finish faster, often appearing darker. Apply a light pre-coat to end grain, let it soak in, then apply your regular coat to even out the color. Horizontal surfaces like deck boards and stair treads take the most abuse from foot traffic, UV exposure, and standing water, so these areas benefit most from a second coat. Vertical surfaces like railings can often get by with one generous coat if you’ve applied it properly.
After your final coat, stay off the deck for at least 24 to 48 hours (longer in high humidity). Most products reach full cure in 7 to 14 days, so avoid placing heavy furniture or planters during that period. Once cured, your deck will need maintenance. Plan to clean it annually and recoat every two to four years depending on sun exposure, foot traffic, and product type. Regular cleaning and prompt recoating when you notice wear keeps the wood protected and avoids the need for complete stripping and refinishing down the road.
If you’ve read this far and you’re feeling overwhelmed by the time, tools, and technique required, you’re not alone. Most homeowners underestimate what’s involved in a professional-quality deck refinishing project. Between prep, repairs, sanding, and application, you’re looking at 20 to 40 hours of work for an average-sized deck, spread across multiple days of favorable weather. For many of our clients in Freehold Township and throughout Monmouth County, the value proposition of hiring Richard K. Moore Professional Painting becomes clear at this point. We handle everything from power washing and surface prep to finish application, using premium materials and proven techniques refined over three decades serving Central Jersey. Our crews work efficiently, our finishes carry warranties, and you get your weekends back. Whether you choose to tackle this project yourself or bring in professionals, the most important thing is doing the prep work right. That’s what determines whether your deck looks great for two years or ten.